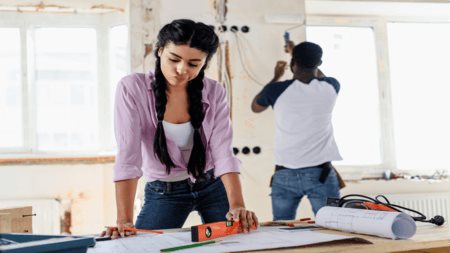
A bathroom is usually the smallest room in the house, with fixtures that are immovable — unless, of course, you want to spend a small fortune on a complete renovation. However, you can get a completely different look at a small cost, which will give you a refreshing modern update. These minor changes can easily be accomplished in a weekend.
Before you start, it’s important to consider what you want to achieve. Perhaps you have a theme in mind or a colour palette. It often helps to look at images of bathrooms that you resonate with. Here are some ideas, which will also dictate the colour scheme:
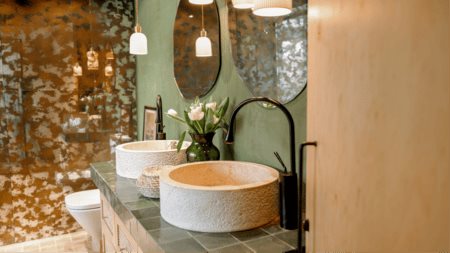
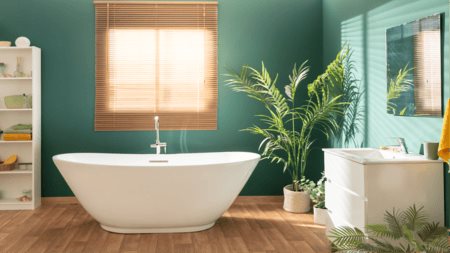
Spa-like: light-coloured wood, green plants, soft lighting
Beach: blues and whites, and coastal elements like shells
Monochromatic: choosing two colours, for example, black and white
Tropical: island-style green plants that drape, or exotic flowers, lots of different tones of green
Colour-based only: where you choose a mix of different colours that merge well together
Planning ahead
Once you have an idea of the look or feel you want to create, you’ll need to decide whether or not you want to paint the walls and what colours are going to feature predominantly. It is also a good time to collect or buy the items you want to replace or add to your refreshed bathroom.
These can include:
Paint: Before committing to a paint colour, buy some paint sample pots and paint stripes on the walls so you can easily see the effect. Or simply paint the entire bathroom white, which will allow you to introduce any colour scheme in other areas. Another wall choice is to consider wallpaper, although this can be quite time-consuming and expensive.
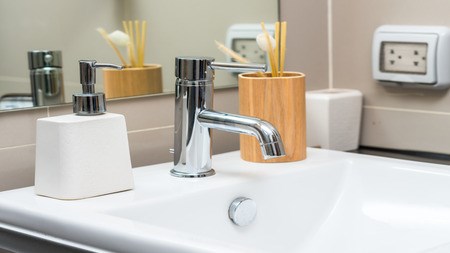
Taps: These don’t have to be an expensive replacement. Provided the replacement follows the same fixture points, you should be able to replace taps yourself. YouTube videos explaining how to do this are worth looking at before you commit to this job.
Windows: Decide on the treatment. Do you want blinds, curtains, or frosted glass? You can actually buy a frosted film to place over clear glass, which is very inexpensive.
Floor: Consider placing lino tiles over existing ones for a new and completely different look.
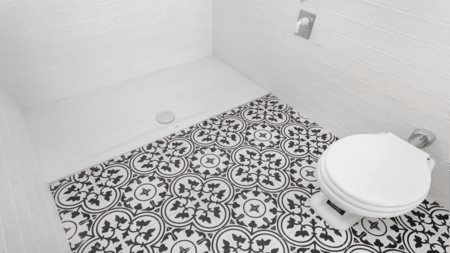
Tiles: Tiles can be painted over with special treatment, or in the same way as a floor, you can buy tile films that you can overlay on the existing tiles. You can also get sticky tile trims that add a decorative element above the existing tiles.
Shelving and cabinetry: You can consider painting existing cabinets. If you don’t have much storage, consider buying shelves that you can strategically place near points where you need to access shampoos, soaps, and sponges. You can also purchase cabinet handles.
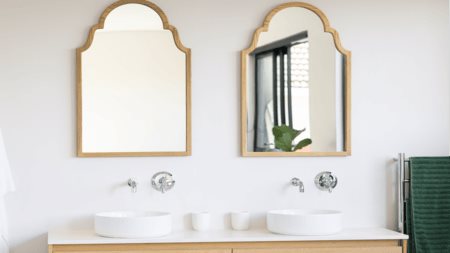
Mirror: Consider replacing the existing mirror with a new one or painting the frame of the existing one.
Lighting: Consider replacing the bathroom light with something more in keeping with your theme. Some people even fit a modern chandelier for a dramatic effect. Sometimes all you need to do is change the globe or add strip lighting underneath cabinet shelves.
Towels and décor: Collect all the items you would like to use in the bathroom, which may even include new towels, a painting or poster, towel rail and toilet roll holders, soap holders or dispensers, plants, and a handful of non-usable items for decoration.
Perfect — here’s an updated Preparation section with more practical, detailed tips for each step. It keeps the tone clear and confident, while offering useful direction for a successful DIY bathroom refresh:
Preparation
A successful weekend bathroom makeover starts with smart preparation. By planning the order of tasks and setting up your workspace properly, you’ll save time and avoid DIY headaches. Here's how to get started:
1. Clear out the space
Remove everything that isn’t fixed:
Take down towels, mats, toothbrush holders, storage baskets, bins, and ornaments
Unscrew towel rails, robe hooks, and toilet roll holders — especially if you want to reposition or replace them
This gives you a clean, open canvas and prevents mess while you work.
2. Give it a deep clean
Before any painting or sticking, all surfaces must be clean:
Use sugar soap or a degreasing cleaner on walls, tiles, cabinets, and doors
Pay special attention to corners, grout lines, and behind the toilet
Rinse and let everything dry fully before moving on
3. Prep for painting
Whether you're painting walls, tiles, or cabinets:
Lightly sand any glossy surfaces first so the paint adheres better
Wipe off dust with a damp cloth
Use masking tape to protect fittings, light switches, skirtings, and edges
Lay down an old sheet or drop cloth to protect the floor
Painting tips
Use a brush for edges and corners, and a roller for flat areas
Stick to water-resistant paint that’s made for bathrooms (anti-mould and wipeable)
For cabinet doors, unscrew them and paint flat on a surface to avoid drips
Paint the mirror frame for a budget-friendly update — use a small brush and apply a primer first if it’s a glossy or dark wood
4. Replace or refresh the mirror
Option 1: Replace it entirely with a mirror that suits your new theme — round, framed, arched, or even backlit
Option 2: Update what you have by painting the frame in black, white, or gold for a more modern or dramatic look
Check that any new mirror is suitable for humid spaces and comes with wall anchors or adhesive fixings if you're not drilling into tiles
5. Get your tools and materials ready
Make sure you have everything you need:
Tools: drill, screwdriver, spanner, level, masking tape, cleaning cloths
Supplies: paint, rollers, sample tiles or lino, hooks, screws, plugs, adhesive, wallpaper or tile film
Lay everything out and keep similar items grouped together so you’re not hunting for them while working
6. Assemble anything new
Flat-pack shelving, new towel rails, or light fittings should be built or unpacked before installation day. Test that everything works — especially lights or electric items — before fitting them.
7. Final checks before day one
Decide your paint colour and finish — test swatches directly on the wall
Choose a layout for décor and storage (e.g. where the shelf or artwork will go)
Measure and mark positions for hooks, mirrors, or rails using a spirit level
Quick checklist for a smooth start
Surfaces cleaned and dried
Fixtures removed
Supplies unpacked and ready
Tools charged or working
Drop cloth down, masking done
Mirror and fittings prepped
A bathroom makeover can be a project that can be done singly or with help. If you focus purely on cosmetic updates, you’ll be surprised how dramatic a change you can create with minimal effort and time.